Tuesday, June 29, 2010

Fabrics for 3 dresses, some free fabric samples, and an Update on my brother.

First of all, this is the fabric and these are the antique linen hand-appliqued napkins that I am using for the commissioned dress.  This fabric is a fine 100% cotton pique that I bought in Knoxville at Gina's Bernina store.  I haven't shopped there in a long time, so long in fact that they are in a new location, and I didn't know they had moved.  They have wonderful fabrics there.  Most are pretty but pricey.  That's one reason I haven't shopped there often.  But, this time, I didn't need a lot of yardage and this piece is 54 inches wide!  It is the perfect color match to the napkins, so I didn't feel I had a choice.  I have the pleated panel back smocked and I'm going to construct the dress before I actually do the smocking.  I've never done that before so we'll see how it goes.  I think it will be fine.                         
Next, these are the fabrics that I am going to use to make coordinated dresses for our granddaughter who isn't born yet and her big sis.  I am using the fabric on the left with the larger polkadots for big sis, who will be three in August.  This will be one of her birthday gifts.  I'm using the small polkadotted fabric for her little sis who will be born soon.  Their mom wanted fabric that didn't look so summery or springy but that was still light weight since they live in the desert out in Arizona. I'm going to use the two black and white dotted fabrics for bias binding, piping, maybe a little ruffle, etc....... I haven't decided exactly how I'll use them, but I think they will be good accent fabrics for the other two and will help in the coordination of the two.  I also have pleated back smocked panels ready for these two dresses, as well.  I figured that if I can get them all three constructed that I can do the hand-smocking while sitting with my mom, with my brother , or while on an airplane.  So, that's why I'm going ahead with the construction.                                               
This is half of a pile of upholstery samples that were given to me recently.  My husband and sister laughed at me for taking them, but what do they know?  I've already made a small shoulder tote for my friend for her birthday.  She likes to keep her hands free and doesn't like to have a big bag, so I made her a tote that is just big enough for her cell phone, her glasses, and maybe some identification and $$$.  I used three coordinating samples in blue and gold. I forgot to take a photo of it before I gave it to her.  She loved it, though.  Actually, I may just make myself one, too.  I can make all kinds of cool totes and who knows what else from these.  So, just laugh all you want dear husband and sister.  You may just be the recipient of a gift made from some of these!  Ha!

An update on my brother:
They opened up his incision from his hip replacement, yesterday.  They drained, believe it or not, 4 liters of YUK from the site!!!! They irrigated it and inserted two drains.  He will be in the hospital at least through the weekend.  Those poor nurses!!!  My brother is a dear, sweet, compassionate, but extremely impatient person!!!   This morning a man who is a consultant for infectious diseases came to see him.  He told my brother that they would send him home with an IV port of some somewhere?  I think Home Health folks will come to his house to administer this for him and to check him out.
  I had a feeling they would do this, because he will need these antibiotics for weeks.  Then, once the infection is gone, whenever that is?, they will go back in and redo this procedure, this time putting in a permanent prosthesis. I sure hope this takes care of the staph.  It can be a really nasty germ from all I hear.
When they were preparing him for the surgery, yesterday, his wife and their neighbor were in the pre-surgery holding room with him.  He told the nurses that both of these ladies were his wives because he was a polygamist!!!  Hilarious.  He also told the nurses that his wives had been drinking beer all morning!  I have never seen my sister-in-law take a drink of any kind.  Of course, they knew that it was the drugs talking!  Coming out of surgery, he said that he had dreamed that he was in a movie playing the character of a coach with Meg Ryan.  He thought the surgery was a part of the movie.  He said quite a few funny things.  He called me last night to apologize if he said anything vulgar!  He didn't, but he wasn't sure.  I should have told him that he did so I would have something to blackmail him with later.
It's time to sew a little before going to feed Mother lunch.

Monday, June 28, 2010

Prayer Request

My brother had a hip replacement done a month ago.  He now has a staph infection in that leg.  At 1:00 today they are going to open up the surgery site, take out any plastic parts and wash the joint really well, hopefully anyway!  He is on an antibiotic IV and will be for however long it takes for the infection to clear up.
He was really doing well, we thought.  He even drove an hour to visit our mom on Wednesday last week.  On Thursday he had a fever, and by Friday he was in excruciating pain.  He went to the ER where they gave him antibiotics, did blood work, and sent him home.  On Saturday they called and told him he needed to be admitted so he could have antibiotics by IV.  Yesterday they took fluid from the hip site, and this morning told him that he needed to be opened back up today. 
We are just praying that this is all they'll have to do.  However, we know it is in his blood and that the entire leg was hurting, not just the hip joint.  We are praying that it hasn't spread to any other parts of his body, like the other hip that he had replaced two years ago.  We are praying that this procedure today will take care of everything.  He works with severely handicapped students and is supposed to be back at work  the first week of August.  We are pretty sure that won't be happening.
Mother is about the same.
I do know this is supposed to be a sewing, writing, artsy kind of blog.  Please be patient with me while I deal with life issues that don't pertain to those areas. 
I really am working on some smocking.  I have back smocked panels for two of the three dresses.  I need to purchase some embroidery floss in the right colors.  I'm surprised that I don't have what I need, because I've got lots of different colors.  I need a really pale yellow, though, and the only yellow I have is very bright.  I will try to take pictures soon and get them posted.

Sunday, June 27, 2010

How to - 3D Papercut Portraits

http://www.dudecraft.com/2009/11/papercut-portraits-tutorial.html


Several of you have asked how i learned how to do the 3D paper cut portraits.  I learned from Dude Craft.  Above is a link to the post that I learned from.   I don't do mine with an exacto knife, however.  I use little scissors.  I also haven't found the paper like he uses.  I finally found some that I like from Hobby Lobby.  These really aren't all that difficult.   They are a little tedious, though.   The results are so much fun that it's worth it.

Saturday, June 26, 2010

Asleep at the keyboard...................

I have three smocked dresses in the works, barely.  I will post photos soon.  First, I have to take some photos.  This has been a rough week for my mom.  I haven't done a lot of anything sewing or computer related this week.  I've tried to catch up on reading some blogs this evening.  I took time to go fabric shopping yesterday.  I needed to get away for a couple of hours and I needed fabric, so it was the perfect thing to do.  Besides, I love to look at fabrics.  Between that and actually sewing with them, what better relaxation can there be? 
Right now, I'm going to bed................................... I am so tired................................zzzzzzzzzzzzzzzzzzzz

Tuesday, June 22, 2010

Five New Posts Today! Well, Six if you count this one!

I have decided to enter the CSI project for this week, which is wall art.  I don't know if any of these actually qualify, but it's fun to enter and to see what everyone else has done.  I decided it would be easier to just repost about these five projects rather than go back and find them so please be patient with me.  I'm not even sure that I have posted about each of these.
The link to the CSI site is at the top of each of my next five posts if case you are interested in going there to see all the other really wonderful projects that others are doing!
Julia

My First Sewing Creation

This is a somewhat blurry photo of the first garment I ever sewed and actually wore.  My grandmother helped my cousin and me make these halter tops when we were about 9 and 10 years old.  I wore this to school as often as my mom could get it laundered because I was so proud of it.  It is completely hand stitched.  Of course, the only stitching to it is all around the clean finished edges and the bias binding for the neck and tie..

3-D Sherensnittes of my grands

These are of four of my five grands.  I had so much fun cutting these paper-cut portraits.  They are framed and hanging in my hall way.  I don't have the one of Little Man pictured here.

Kitchen Wall Art

These are photos of my hand painted kitchen border.  I did this one day when I was inspired by the design on the plates that once belonged to my grandmother's best friend, Aunt Josephine to us kids. 

Scherenscnittes of Grands

These are scherensnittes, or paper cuttings, that I made for my daughters of their children for Christmas.  They are framed and hanging on the walls in their homes.

Church Murals

Visit thecsiproject.com                                                     
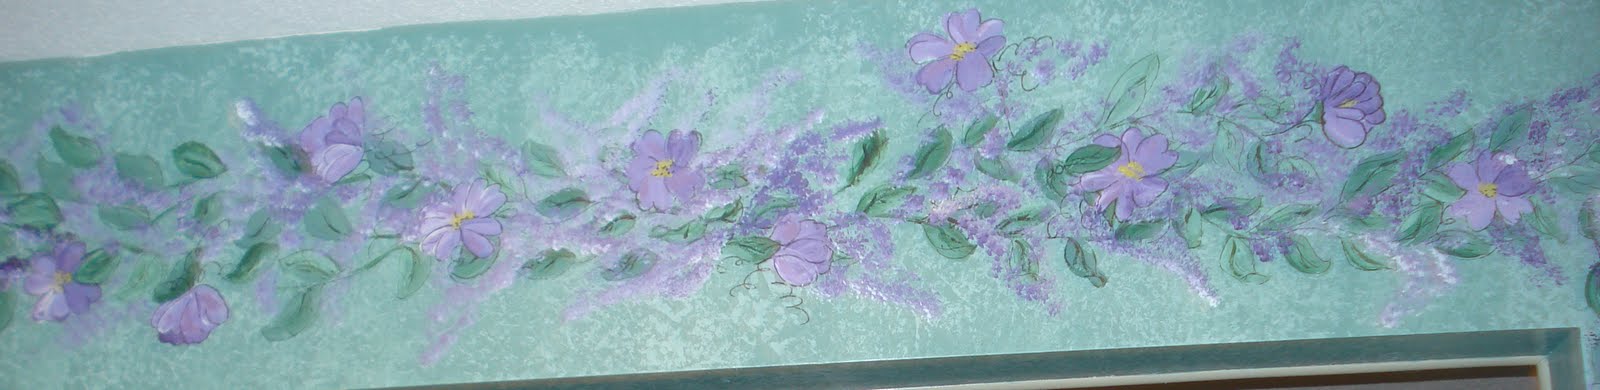
These are murals that I have painted for two different churches.  The Noah's Ark is for the church we attend now and is located in a large room where the children gather for varying activities.
The Hebrew School mural is in the church we used to attend and is in a children's Sunday school classroom.

Monday, June 21, 2010

Peek-a-Boo Baby Mirror

 
This is a peek-a-boo mirror for our soon-to-be-born new granddaughter.  This will hang on her crib, which is a painted a pretty white, and will be against a yellow wall.  This photo is of the crib at my house that my girls and a whole bunch of other babies have slept in over the years.  This little one will be able to wake up and keep herself occupied with her reflection.                                                                          
I used four unbreakable mirrors that I bought at JoAnn's for a very little amount of $$.    I forget just how much, but it really wasn't much at all.                                                                  
These mirrors have a peel off plastic covering that is to prevent scratches.  It's a good thing this is on them because I got glue all over the front of them.  I admit it, I am a messy person.  I will leave these protective coverings on the mirrors since I'm going to be mailing this to my daughter.  She can remove them before tying it to the crib.
 
I glued the four mirrors to the back of a piece of canvas board that I had.  I tried using plastic cross-stitch sheets, but the glue wouldn't stick.  I also tried a cool hot glue gun, and that was not working.  I ended up using liquid stitch glue.  
I intended to take pictures as I did each step, but I didn't.  I didn't know what I was doing, I just made it up as I went along.  I cut a piece of the same fabric that the crib skirt is made from that was about 1/2 inch wider all the way around the four mirrors.  I then cut 4 strips of the same fabric that were about 3 inches wide.  Two of the strips were the length of the two long sides and the other two the length of the shorter sides.  I folded these strips in half and stitched the length of the raw edges, and then I turned them and ironed them flat.  I sewed one inch pink ribbon down the length of each of the 4 strips just to make them a little wider.  I stitched the long strips to the long sides and ONE of the short strips to One of the short sides.  I then sewed just the ends of the other short strip to the corner ends of the other end. (I'm not sure this makes sense.)  I did this so that I would have an open end for inserting and removing the mirrors so my daughter can wash this mirror casing.  I then stretched ribbon from the center across to the other center of the two long ends and the same with the short ends.  This forms the window pane look and hides the seams where the four mirrors meet, and it helps to hold the mirrors in the case.
Then, I sewed Velcro strips to each side of the open end to hold that end closed.  Last, I cut 6  (approximately 12 in.) lengths of the ribbon.  I folded them in half and zigzagged several times across the folded edge of the ribbon to hold each strip to each of the corners and at the center top and bottom.
Then, I was done.  I hope these directions make some sense.  One assignment I used to give to my sixth graders was to write directions for making something or playing a game, etc... to see if someone else could understand them to follow them.  I'm not so sure that I have accomplished this myself.

Saturday, June 19, 2010

Baby Carrier

This is the baby carrier that my daughter asked me to make for her.  She sent me several sites , and I found some myself of different styles of carriers.  I took ideas from each of the sites and added some of my own.  These sites had instructions for making these.  I would not make one to sell, as that would not be ethical, but for my own daughter, it's ok.  This pink fabric is a coordinating fabric to the crib skirt that I made and posted about earlier.  You can see that I padded the bottom portion of the carrier to make a comfortable seat for the little one.   It can fold up one or two times, as needed, while the baby is tiny.  As she grows taller my daughter can unfold it.                                    
                             This picture shows the pockets.  There are two pockets that open from the top and the one big tan pocket opens from the sides.  I also added a ring on either side for which to clip keys or toys.  I decided that the two top opening pockets would come in handy for things like wipes or whatever.  The side opening pockets will make it easier for my daughter to reach if she is wearing it on her back.  There should be room for a couple of extra diapers, some wipes, etc.....                                                                  Below is the hood.  I made tiny loops from ribbon and threaded another ribbon through them to tie to the ribbon at the base of the shoulder straps.  As you can see, I appliqued cut-outs from the floral fabric to decorate the hood.Here you can see how the hood can fold when it isn't needed.  The ribbon helps to hold it in place when it is folded.  In the top picture you can see the other side of the hood where I sewed stripes of ribbon across in the places for the hood to fold.  That just helps it to fold better.  Does this make sense?  I padded the shoulder straps out far enough for a comfortable fit over the shoulders.  However, I left the rest of the straps unpadded for easy tying.  I did the same for the waist straps.                              
Now, it's on to make a couple of other things for this baby girl.  Then, I've been commissioned to make a smocked dress incorporating antique linens for a 2 year old.

Wednesday, June 16, 2010

RED SOX JERSEY for Little Man

This is for Little Man.  He was 2 years old recently, hence the 2 on the back.  His dad is a
Boston Red Sox fan.  Since, we are not too far from Atlanta, we claim to be Brave's fans, but we really aren't too fanatical.  Now, if we were talking college football or basketball, it would be a different story.  I couldn't bring myself to make an Alabama, Florida, Connecticut, etc... shirt for one of our grands.  No offense to any of you who are fans of these teams, but if you are I'm sure you totally understand how I feel, because you probably couldn't make a cute little orange and white something, either.  Thank goodness, I won't ever be asked to since our girls are all University of Tennessee fans, just like us.  One son-in-law likes UT, but also NC basketball, and as long as they aren't playing us we can live with it.  Little Man's dad and mom aren't as gung-ho sports fans as the rest of us, but, as I said, his dad does like the Red Sox.
I really had fun making this little baseball jersey.  I used two men's tee-shirts.  I bought one each of red and white at the Family Dollar Store for only $5.00 each.  They were the Bugle Boy brand, and had a very nice feel to the knit fabric.   I cut the shirt from the white one, obviously.  I cut it so that the hem of the tee-shirt serves as the hem on this little shirt.  There was plenty of fabric left for the sleeves and some left over for something else later.  As for the red.....I cut the hem off the red tee-shirt to use for the trim on the placket.  As far as the placket goes, it really isn't a separate piece.  The pattern I used actually had the facing and front as all one piece.  I just folded it to the outside rather than the inside.  I did the back facing the same way, folding it to the outside rather than the inside. 
I ironed a two-sided adhesive to the back of a portion of the red tee-shirt, then cut six little rectangles all the same size from which I cut the letters that spell out RED SOX. I made sure that they would fit the area on the front of the shirt.  I researched on-line to make sure I knew what the Red Sox lettering looked like.  Mine are certainly not perfect, but close.   I cut one larger rectangle for the "2".  After cutting the letters and the number, I pulled the paper off the back, ironed them into place and then zig-zagged around the edges.  I set my machine for narrower stitches that were very close together, almost a satin stitch setting.  It was very hard stitching around the tiny little curves, etc...  I just took it slowly.  (This is the same process I used for sewing the appliques on the "flower" dresses that I posted about a few days ago.)  The two-sided adhesive was labled "for sewing".  Most of these adhesives are gummy and difficult to sew through, because they gum up the needle, but this did not do that!  Yea!!!  I found it at Walmart, believe it or not. I didn't pay attention to the name brand and I've already thrown away the packaging.   I was thrilled to find it.  It sure made the appliqueing easy to do!

Tuesday, June 15, 2010

I just made this pattern for my oldest grand.  I made view B with out the lace "v" down the front or lace around the bottom of the hem.  I lengthened it a bit, too.  I made the front bodice from ribbon that I stitched together.  I lined the front bodice so it won't be itchy!  For the hem of the bottom and the sleeves, I did a shell stitch.  I do this using the blind hem stitch on my machine.  I set the tension fairly tight, flip the stitch to the mirror image, fold under the edge like I'm going to do a clean finish, and then just stitch away.  It makes a pretty scalloped edging.  I added the elastic across the tops of the shoulders.  I am finding that patterns in the bigger girls' sizes all have humongous necklines. They are too low cut and way too wide.  I'm hoping the elastic will help.  I always sew French seams whenever possible.  I just like the finished insides.  This was no exception. 
This fabric is a 50% cotton 50% polyester.  It has a sheen to it.  I was a little nervous about it, so the first thing I did was put it in the washer, then the dryer (on a low setting), and then checked out to see what the iron would do to it.  I don't sew without my iron.  It was easy to sew with and nothing seemed to affect the way it looks or feels.  It's very thin, so will be cool for the summer.
Above you see all of the pictures.  I haven't quite figured out bloggers new "improved" way of doing things, but perhaps with practice, I will.  
I just got an order for a dress from a lady who saw this blog on which I posted.   I am on the committee that is planning this wearable arts fashion show.  One of the other ladies on our committee sent a link to this blog to her sister, who wants a dress for her granddaughter.  Yea!!!!

Friday, June 11, 2010

1, 2, 3, 4............

For two of my grands,


And the buttons.


My daughter bought this pattern last summer.   She was going to make it, but she gave it to me, instead.  I finally got around to it.  When I was getting ready to cut out the two red and blue dotted fabrics for Lil'E and Big Girl R, I decided to go ahead and cut out two more.  I almost never follow a pattern completely, but I did this one.  Whew!!!  How easy it is to not have to really think about how to make something work, just read the directions, or in this case look at the pictures and TA-DA! it's done!!   The pattern was so simple, and I had more fabric that would work.  I've been meaning to make some things to have for either an ETSY shop (MAYBE????) or to have to sell at our wearable arts fashion show, or to sell at a booth at an art fair in a nearby town, or maybe to donate to the Boys and Girls Club for their auction if I don't have time to do what I really plan to do for it.  I'm not sure what I'll do with the two extras.  

These really were easy.  They would be easy to make reversible, too.  I was thinking maybe pumpkins, leaves, snowmen, poinsettias, bows or hearts (like on the pattern) for holidays, or I could imagine birds, butterflies, and all kinds of other general things.  I don't really like doing the same thing over and over, but if I vary the appliques and colors, etc... maybe it wouldn't be too bad.  Or, I could just make double of everything I make from now on to have a variety of stuff to sell.  I have learned that taking orders doesn't work.  You have to actually have an item to sell on the spot.  

If any of you have an ETSY shop, what do you think?  Is it profitable, worth your time and trouble, etc....?

Thursday, June 10, 2010

Can You Believe..............(and a great giveaway!)

what I did!?!  The little aqua Barbie dress is for my friend's (who happens to also be my manicurist.....yep, I treat myself to a manicure every other week) daughter.  I took it yesterday.  Little Cutie tried it on.  It fit perfectly, except that the elastic across the back was just a little tight and the straps just a little short.  Little Cutie just smiled with stars in her eyes because she LOVED it!!!   Yea!!!!  The elastic and straps are an easy fix.  Whew!!!
She took the dress off, her mom laid it across my lap, and we proceeded with the manicure.  WHY did I put my hand in my lap????  WHY?  Because I wasn't thinking!!!  Anyway, of course you know what happened, right?  That's right..... I got nail polish on the dress.  Bright reddish pink nail polish.  Granted it was just a little, but any is too much.  It got on the lace across the front and on the inside of one of the straps.  Her mom was like, "Oh don't worry, my nail polish remover will take that out."  "Try it now," I exclaimed.  She did.  IT DIDN'T take it out!!!!  So, it was back to the sewing room.  I took apart one of the bodice pieces, removed the lace and the strap.  I, thankfully, had more and enough of the lace left over to replace it.  I remade the strap.  Then, I sewed it all back together, lengthening the straps and elastic!!!  Whew!  It's fixed and delivered, again!  I just hope it fits correctly now.  Her mom said she'll wear it to church on Sunday.  I hope to see her in it again.

Don't forget to check out my other blog if you are interested in a Stream-of Consciousness style writing from my mother's point of view.  This is therapeutic for me.  There's a link on the top of my sidebar.

And look at this great giveaway for a baby carrier!


HUNBABA Mei Tai Baby Carrier Guest Giveawayy

Tuesday, June 8, 2010

Couldn't Have Been Simpler!

Here's a top that I have made for our 10 year old grand from a skirt of mine.  I forgot to take a picture of the skirt before I cut into it.  It was a simple a-line 50% linen skirt with a yoke at the waist that hit just above my knee.  I love the embellishment of the scalloped lengths of trim sewn down in a flared pattern.  It no longer fit, and I had only worn it a few times, anyway.  I decided it was really shorter than I wanted to wear  my skirts.   I've decided lately  that I am not going to throw out or give away any of mine or my mom's clothing until I have decided if perhaps I can refashion them into something else.  Some of the fabrics are way too nice to do away with them. 


This is the pattern I used.  I cut it from view B.  I simply folded the skirt down the center back and center front.  I left in the zipper as it was.  I cut the top a little longer and slightly more flared on the sides.  I left the lining in place that was already in the skirt.  I bound the neck line and arm scythes with a purchased white bias binding.  I usually make my own binding, but there wasn't enough fabric left from the skirt to cut lengths long enough on the bias to make enough binding.
I sewed French seams on the shoulders and side seams.  I clean finished the bottom edge for a hem, and VOILA  a top for our grand.
I think this top will be casual and cute with a pair of bermuda shorts or a little dressy with a skirt.
I hope she likes it.

If you are interested don't forget to go to my new blog titled Baby Girl's Observations that will be a train-of-thought style of writing trying to get into my mom's thoughts.  There is a link at the top of my sidebar. 

Monday, June 7, 2010

New Blog And...ON THE SEWING FRONT

Since this blog is supposed to be dedicated to my sewing and other art pursuits, I have decided to start a new one called, Baby Girl's Observations, that will give me an outlet for writing about my mother and the other wonderful folks at the nursing home with her.  I want to try to get inside their heads and write about what I observe.  I am calling it Baby Girl's Observations because I am my mother's baby girl, but yet, even though she knows me and that I am her youngest daughter, there are times that she thinks there is another baby girl at home who no one will bring to visit her.  Her name is also Julia.  I recently was told by my mom to buy her some shoes, which I told her I did.  I was also forced into telling her that school was out for the year and that Julia made straight A's on her report card because she was very concerned that Julia wasn't doing her work.  She wanted me to go talk to "MY" teachers about her baby girl's work.  See, I want to try to understand some of this kind of thinking.   I know I won't, but at least I will work out some of my frustrations by writing about them.
So, please visit my OTHER blog if you are at all interested in reading my ramblings about my mom and the elderly in general.

Now for ON THE SEWING FRONT:  Here's the other Barbie Dress knockoff.  This one is different in color, obviously, but also in that the lower ruffle is narrower than the top one, partly because I didn't have as much fabric for this one.  That really doesn't make much sense, seeing that the two dresses are the same length, but when I put the other dress together I ended up making both of the ruffles (tiers) narrower.  This one also doesn't have the silver ribbon on the straps. 


Since I added the new blog, something weird is happening when I add photos, etc.... so please bear with me while I figure this out!!!

Favorite Posts

big list of sewing blogs

Big list of Sewing blogs - I'm in, are you?
I'm listed in the big list of sewing blogs Sponsors Advertise on sewing-blogs.com
Julias Sew Sweet
How to Sew
Place your vote for Julias Sew Sweet and find more How to Sew at Seamingly.com.


Attitude of Gratitude Award